When a leaky faucet develops, you may not have to spend a lot of money on a new one. However, this project can test your patience and skills. If you have a single-handle faucet, it is usually easier to repair than a double-handle faucet. You can learn how to fix a leaky faucet below. But if you don’t feel confident with this type of repair, call in a professional plumber to do the job.
To perform this repair, start by removing the faucet’s handle and collar. Next, remove the ceramic-disk assembly and cam. You can purchase replacement seals separately, or you can purchase a pre-made kit. Make sure the replacement parts are compatible with your existing faucet. Then, you can clean and replace the seals. If you don’t have these parts, you can bring them to the store and have them replaced for you.
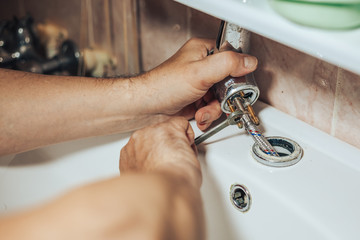
Remove the decorative cap from the faucet’s handle and remove the stem from it. It’s usually attached to a nut by a flathead screwdriver. Remove the packing nut, if it’s attached to the stem. You may need to use penetrating oil to loosen it. If the item is not loose enough, remove it with a wrench. The seat washer and O-ring will also be loose.
To remove a leaky faucet’s handle, you need to remove its stem. You can do this by hand, or you can use a spanner wrench. Afterward, you’ll need to replace the neoprene seal. Before attempting the faucet repair, ensure that you have the correct tools to complete the project.
Before you begin fixing a leaky faucet, make sure you know your model number and brand. Every brand has a unique logo. This will help you find replacement parts and repair instructions. If you can’t remember the part number, take the leaky faucet to a store that sells replacement parts. If the leaky faucet isn’t a common problem, a store will carry the part you need. You can purchase the parts online, but this method can take some time.
If the faucet still leaks, you should use white vinegar to clean the valve body. After cleaning it, you can apply a layer of white vinegar to the sink to remove any mineral deposits. Then, reassemble the faucet and replace the parts, if necessary. Make sure you reassemble the faucet correctly by using the replacement part. You should also check the faucet for leaks. If any, replace the parts with new ones.
First, you should remove the faceplate from the shower valve. In some cases, the faceplate is attached to the shower valve by a metal sleeve. Remove this metal sleeve with a screwdriver or a flat-head screwdriver. Then, you can remove the stem from the faucet using the stem assembly. The stem will slide out of the faucet and you can then remove the valve stem assembly.
If you have enough experience and tools, you can try repairing a leaky faucet yourself. However, this can become complicated if you don’t have the right tools. If you’re not comfortable with the idea of working with water, you should leave it to the pros. The right tools are essential for successful faucet repair. You’ll need a wrench, screwdrivers, and large slip-joint pliers.
Getting a professional plumber to repair a leaky faucet is not only easier than you might think. The average faucet repair costs $210, all-in. Most plumbers charge between $45 and $200 an hour, plus the cost of parts. They’ll likely be able to handle several plumbing problems at once. Then, you can save money on the water bill. You may even be able to do it yourself, but it’s not a good idea to do it yourself.